Build & publish a survey
This walkthrough strings together datasets, the Besigner's form elements, and publishing into one loop: model the responses → design the survey → publish → collect. By the end you have a live survey page whose submissions land in a typed dataset you can filter, search, and export.
Forms and the inbox are available on every plan. Writing submissions into a dataset needs the data store, which unlocks on Starter and above.
1. Create the dataset
Datasets belong to your organization, so every site can share them. Open the organization Data page (or any site's Data page — both edit the same data).
- Choose Add dataset. In the New dataset dialog give it a Name
(say
Survey responses) and a comma-separated list of Fields (satisfaction, visit, topics, comments) — at least one, or Create stays disabled. Create it. - Select your new dataset in the Dataset dropdown and open Schema. The Schema dialog lists each field with its display name, generated field id, and a type chip.
- Use Add field / Edit to type the fields properly:
satisfaction→ type Integer. A form stores every value as text, so the rating lands as"4"; the Data page's=filter still matches it as the number 4.visit→ type Text (one radio choice).topics→ type Text (ticked checkboxes arrive joined with,).comments→ type Text.
- Save schema.
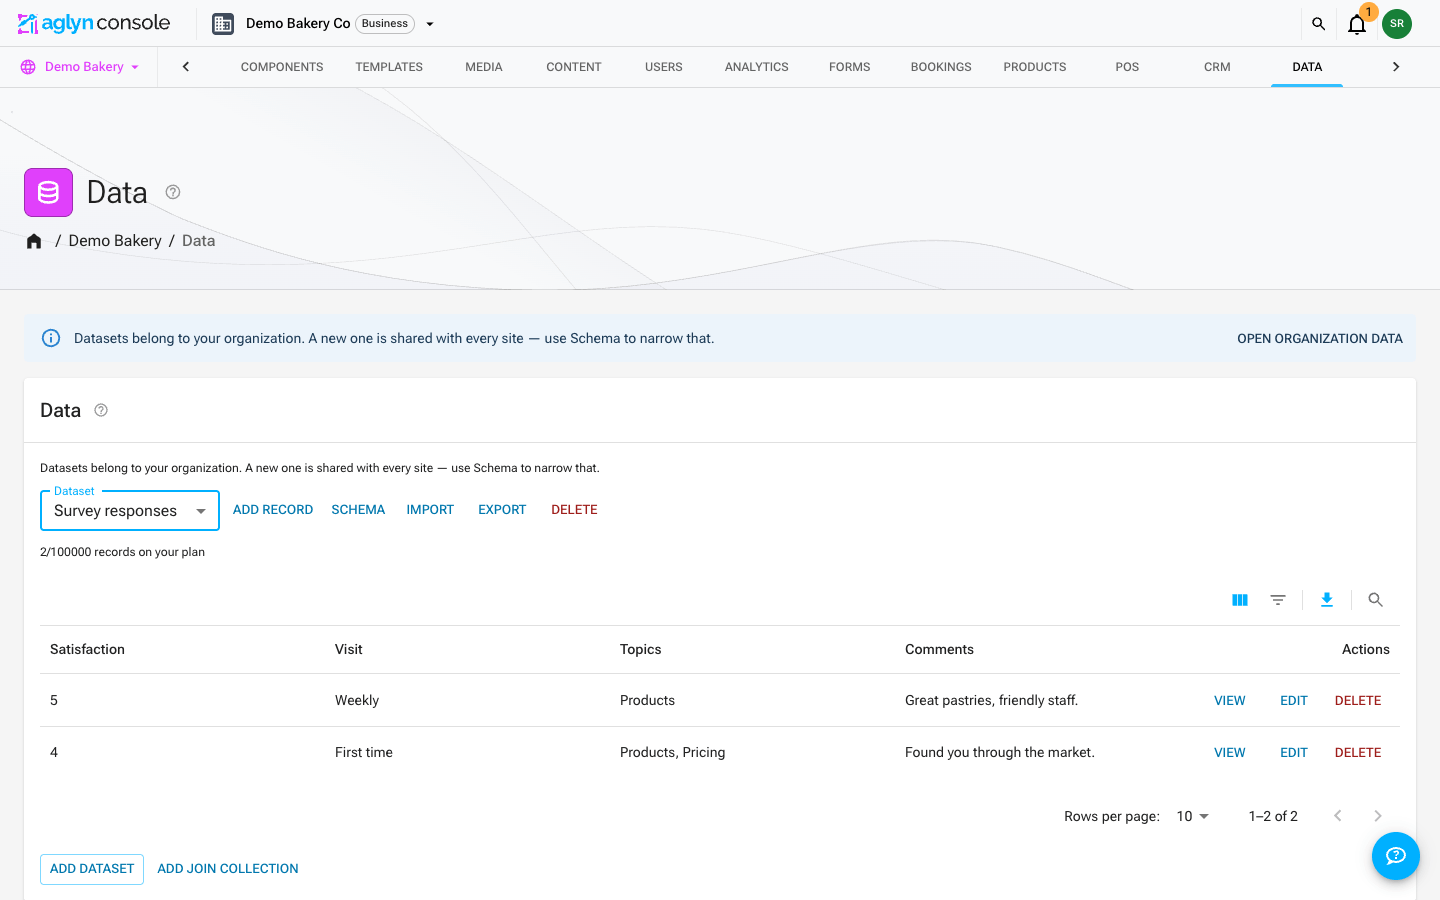
Each field's Display name is what you see in dialogs and table headers; the
field id next to it (a slug generated once from the display name) is the
stable key records store values under — the key {{item.fieldId}} bindings
reference, and what a form field's Maps to schema field picker stores.
Renaming the display name later never changes the id.
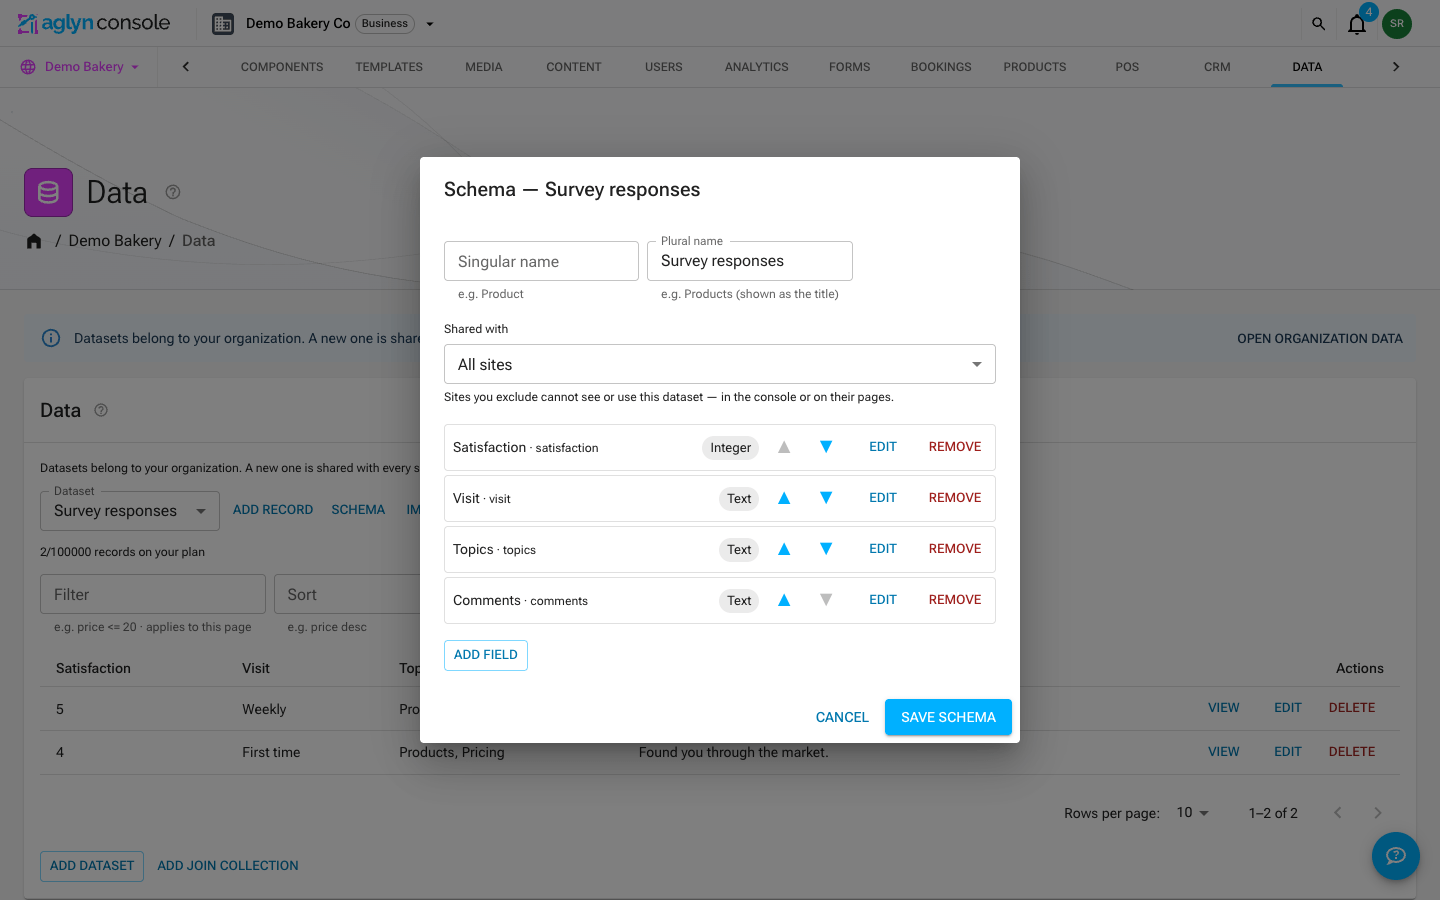
A clean schema now makes everything downstream typed: the record editor renders the right input per field and imports are validated. Form submissions are the exception — they are stored as text without validation, so a submitted value can disagree with its field's type. See the datasets deep-dive for the full type system.
2. Add a page for the survey
- Go to Pages and choose New page.
- Title it
Surveyand give it the slugsurvey— that becomes its public URL path (https://your-site/survey). - Open it in the Besigner.
3. Insert a Form from the element picker
With the page open, add the form:
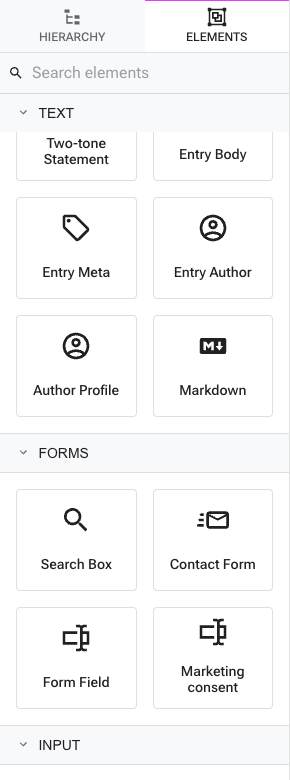
- In the Elements panel choose Add Element (or right-click a node and pick Add element). The Choose element picker opens, grouped by category.
- Expand the Forms group. It contains the Form container, the Form Field element, and a ready-made Contact Form preset.
- Insert a Form. Then, with the Form selected, add one Form Field child per question (the picker's Form Field preset drops a field with sensible defaults).
4. Configure the fields
Select each Form Field and set its properties in the inspector:
| Property | What it does |
|---|---|
| Field name | The key the value is stored under in submissions (and in the inbox copy). |
| Maps to schema field | Which of the dataset's schema fields this value is stored under. The dropdown lists the fields of the dataset chosen on the Form (see step 5) and stores the stable field id, so renaming the field later never breaks the mapping. Left on None, the value matches a dataset field by name instead. |
| Label | The visible input label ("How satisfied are you?"). |
| Placeholder | An optional gray hint inside the empty input ("you@company.com"). It is not a label — it disappears as soon as someone types, so always keep Label set. Radio, checkbox, and rating fields ignore it; a dropdown shows it until a choice is made. Clear it to remove the hint. |
| Type | Text (default), Email, Multiline, Dropdown, Radio choice, Checkboxes, or Star rating. |
| Options | Choices for dropdown, radio, and checkbox fields — one per line or comma-separated. Ignored by other types. |
| Required? | Whether the field must be filled; a required checkbox group needs at least one box ticked. |
"Maps to schema field" lists the fields of whichever dataset the Form is pointed at — set the Form's Write to dataset (step 5) before mapping the fields, or the dropdown reads No dataset selected on the form.
For this survey:
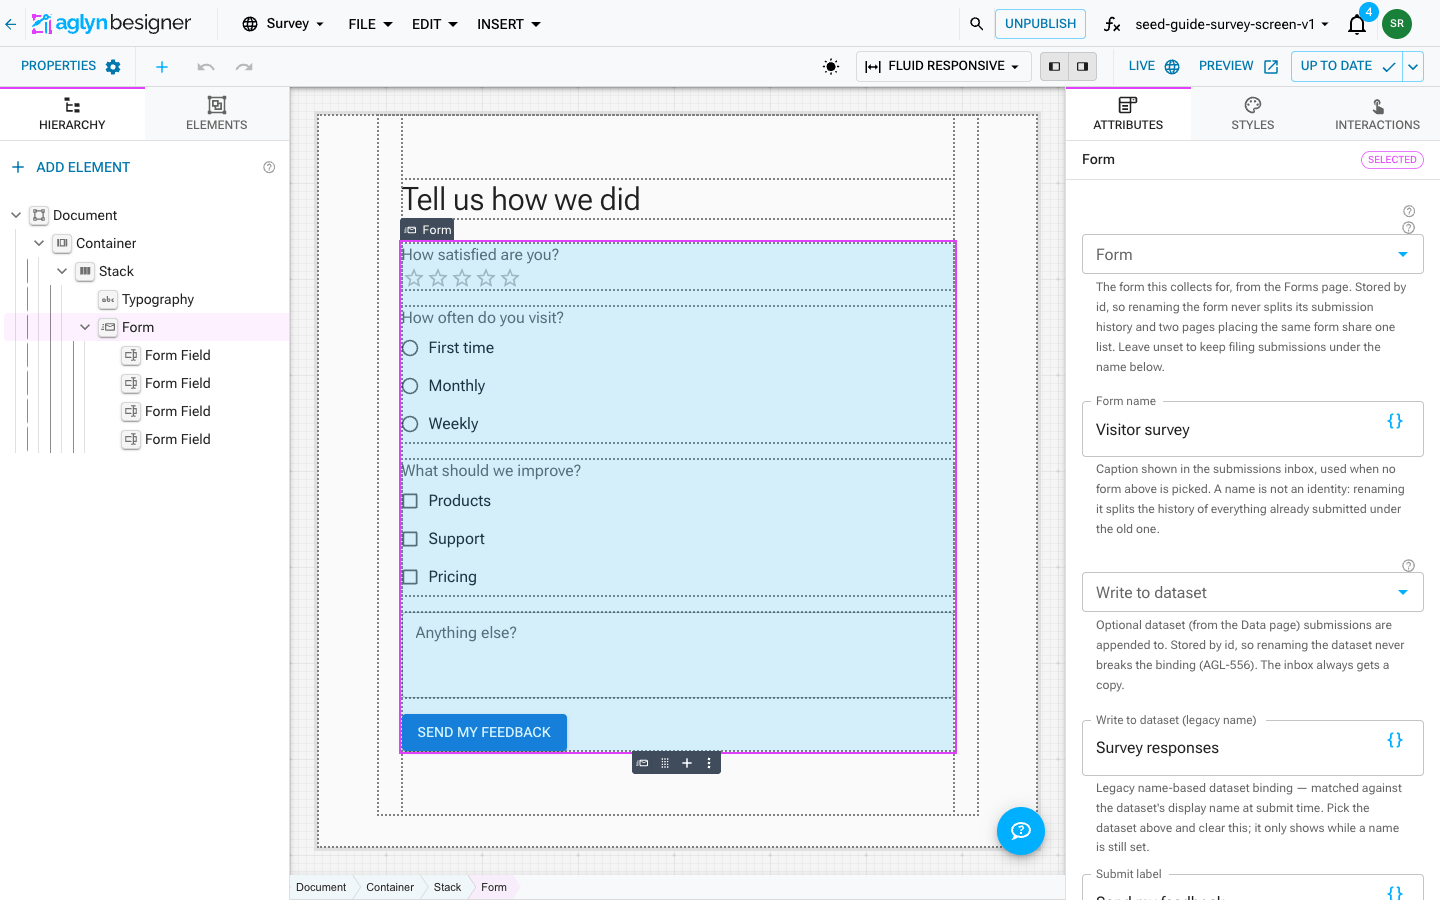
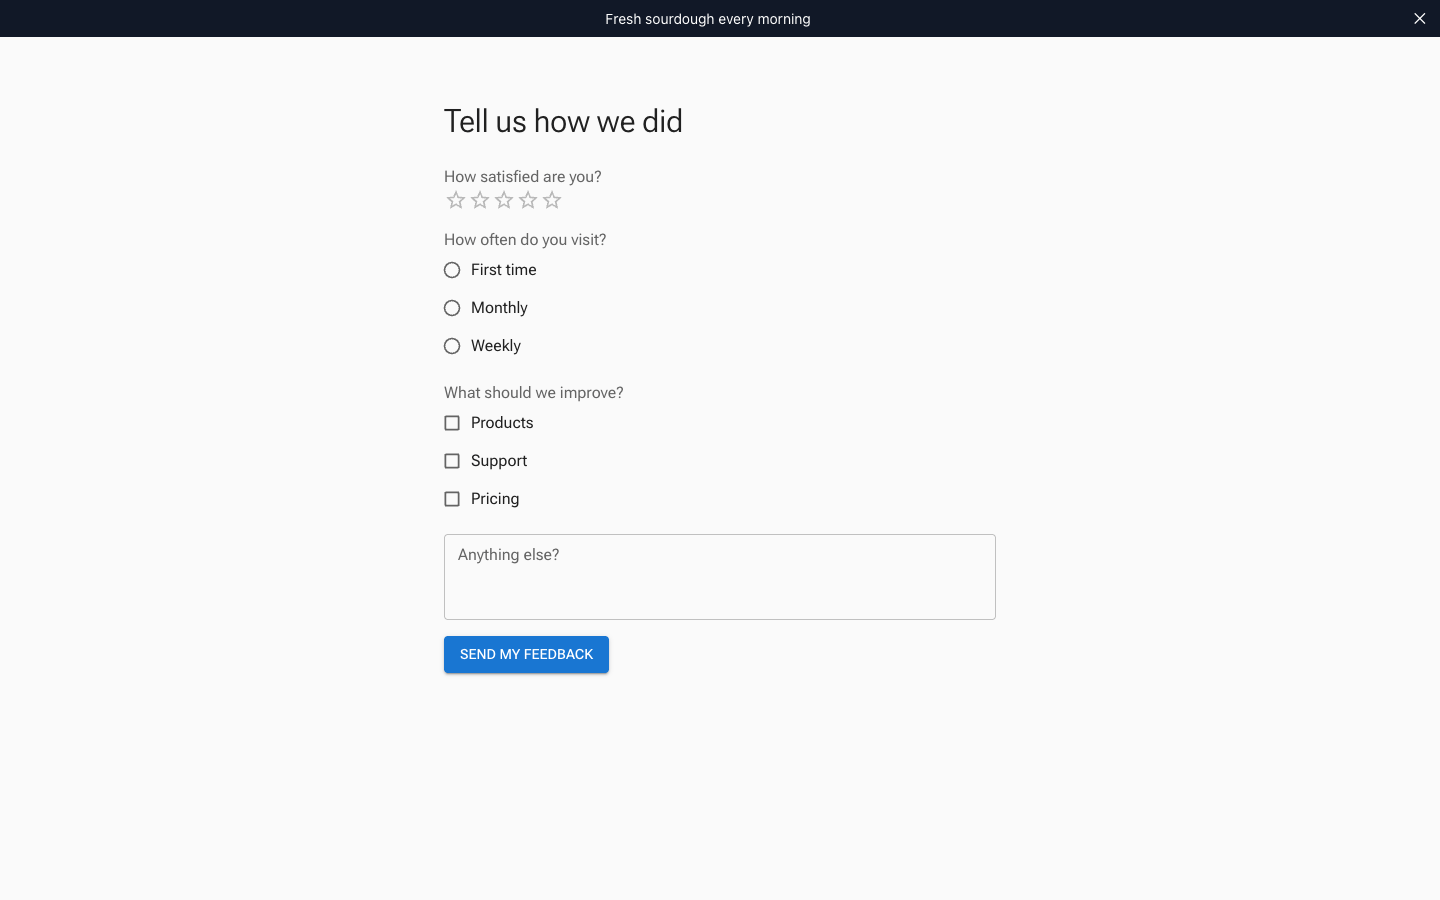
satisfaction— Type Star rating, label "How satisfied are you?". The five stars submit their count (4), which the form stores as text.visit— Type Radio choice, OptionsFirst time, Monthly, Weekly.topics— Type Checkboxes, OptionsProducts, Support, Pricing. Visitors can tick several; the submission joins them with,.comments— Type Multiline for free-form feedback.
5. Point the form at the dataset
Select the Form container itself and fill its properties:
- Form name — identifies the form in your submissions inbox
(
Visitor survey). - Write to dataset — pick
Survey responsesfrom the dropdown, which lists your organization's datasets by display name. The form stores the dataset's id, so renaming the dataset later never breaks the binding. Submissions append a record; the inbox always keeps its own copy either way. - Submit label — the button text (defaults to Send).
- Success message — shown in place of the form after a successful submit.
Both pickers bind by stable id: the Form stores the dataset's document id and each field's "Maps to schema field" stores the model field id. Rename the dataset or its fields freely — records keep landing. Unmapped values still match schema fields by name (field name = field id); values that match nothing are dropped from the record (the inbox copy still has everything). Forms built before the pickers keep working through their stored dataset name — shown as Write to dataset (legacy name) until you pick the dataset above and clear it.
6. Publish
Click Publish in the Besigner's top-right (it flips to Unpublish once
live). If the page has no URL path yet you're prompted to set one first. The
survey is now served at /survey on your site's domain.
7. Watch responses arrive
Every submission does three things:
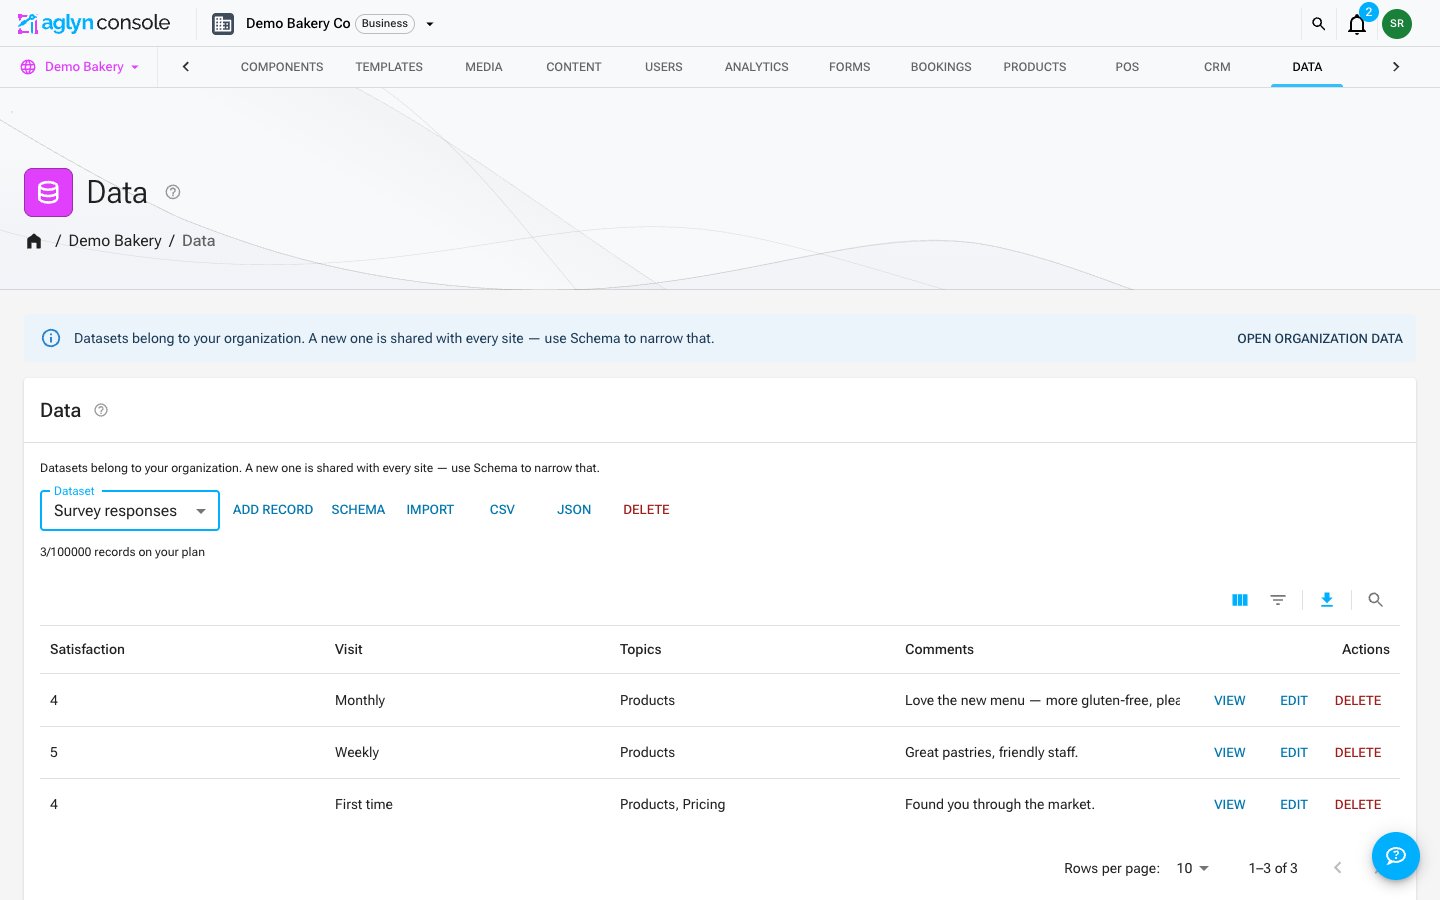
- appends a record to
Survey responses— the Data page updates live; - files an inbox copy under the form's name (see Forms & lead capture);
- fires the
formSubmissionautomation event, so workflows and actions can react (send a thank-you alert, notify your team, write other datasets).
On the Data page, use Filters (satisfaction = 5) or Search (a word from
the comments) to narrow the records. Both reach every record in the dataset, not only the
page on screen; a number field offers = but no ranges, and the column headers don't
sort. See Filter and search the records.
Download the records with Export, which lets you pick the fields and the format
(CSV, JSON or NDJSON) — see Import & export.
Bind a container's Repeat over dataset to Survey responses and reference
{{item.satisfaction}} inside it to render responses back onto a
(members-only?) results page. The deep-dive
covers repeatables.