POS & reservations
POS requires Pro or above. The number of registers a site can run at once follows your plan — Pro 1, Business 2, Advanced 5 — plus any additional register seats you've assigned to that site. A seat is bought once for the workspace and then placed on one site, so buying one does not raise the limit everywhere; see Assigning register seats. Opening more browser tabs does not give you more registers; each sale runs through a register you've created.
Registers
Create your registers under Commerce → Settings → POS registers — one per till or device that takes in-person payments. Give each a name (and, if you use inventory locations, the location it sells from). Every POS sale is tagged with its register so you can reconcile end-of-day takings per till. Your plan caps how many registers you can run; add more with the register add-on in Billing. If you downgrade below your register count, the extra registers (newest first) stop taking payments and show Over plan limit until you remove them or upgrade again — none are deleted.
The register
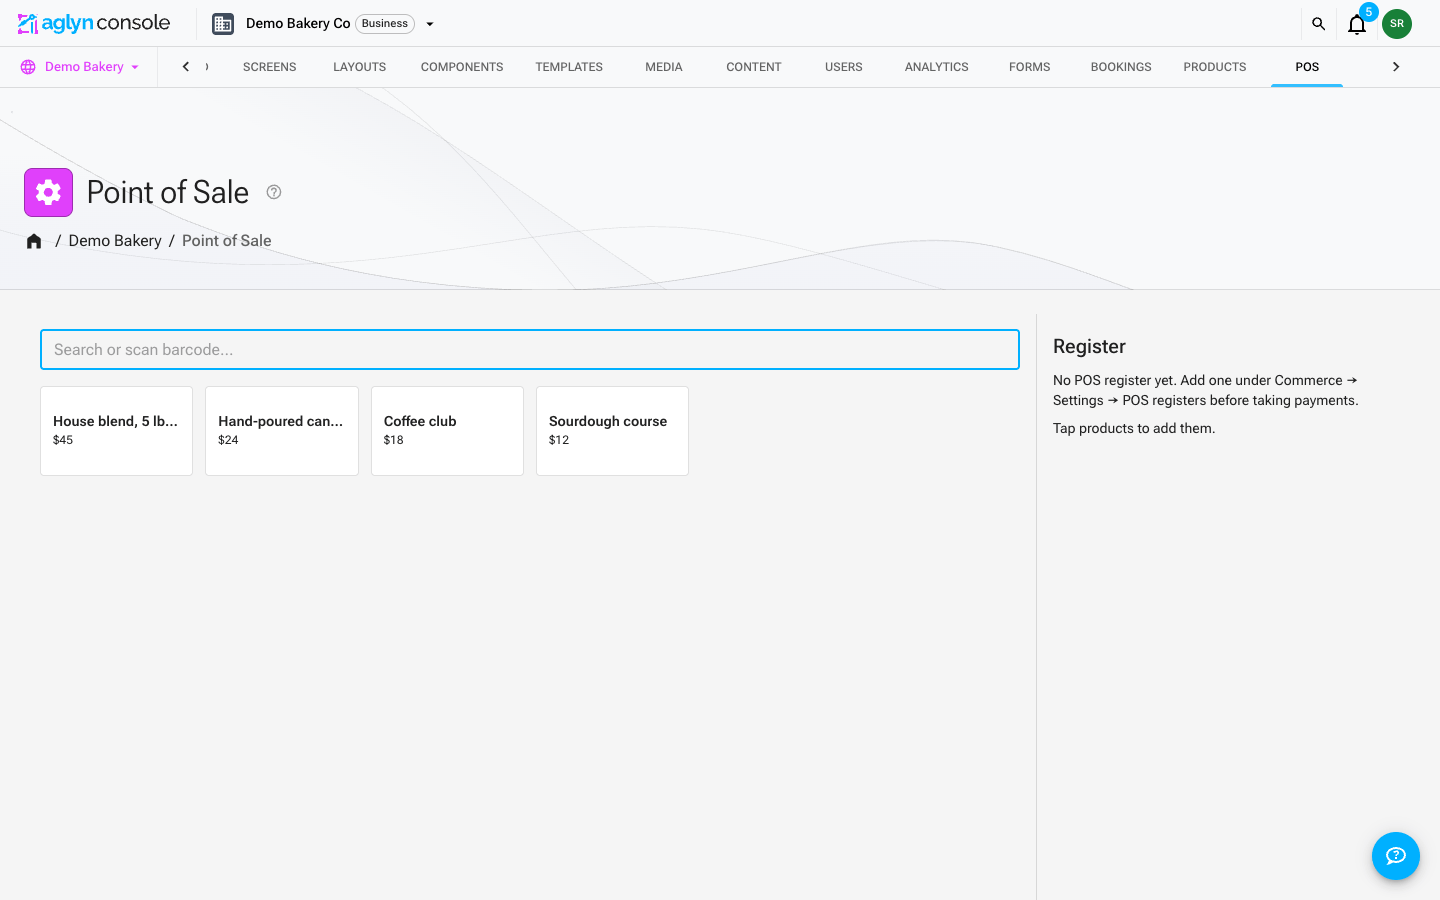
Open /{site}/pos in the console for a touch-first register. Pick which
register you're on at the top of the panel (skipped automatically when you
have only one):
- Product grid — photo tiles with the price, a stock note when only a few are left or none, and a count of how many are already in the basket. Tap a product to add it. A product with variants or modifiers opens a sheet first: pick the size (or other option), the modifiers, and the quantity, and the Add button shows the line's price as you go. A required modifier must be picked before the item can be added. The grid shows your first 500 active products by name; typing in the search box finds a product by the start of a word in its name across the whole catalog.
- Quick keys — the ★ Quick keys chip, first in the category bar, shows only the products you marked Quick key at the register in the product editor: your best sellers, one tap away. Each register device reopens on the chip it was left on. Typing in the search box searches the whole catalog, not just the quick keys.
- Categories — the chips after All show one category each.
- Changing a line — tap a line in the basket to change its variant, modifiers or quantity (type a number or use + and −), or remove it. The + and − beside each line change the quantity by one. Two of the same item with the same choices are one line; the same item with a different choice is a line of its own.
- Barcode scanners — any keyboard-wedge scanner works: it types the code into the search box and presses Enter, which adds the exact SKU/barcode match, variant included. A product with modifiers opens its sheet with that variant already picked. No drivers or pairing needed.
- Charge — when the basket is ready, tap Charge. That prices the sale (tax is added at this step) and opens it for payment; the panel then shows the balance due and the ways to pay. While a sale is open the basket is locked: finish it or void it before ringing up the next one.
- On a tablet — at 900px wide and up, the product grid and the register sit side by side. On a narrower screen the register becomes a sheet that slides up from the bottom, behind a bar that always shows the total and the Charge button.
Modifiers
Modifiers are choices added to an item as it is rung up, such as a milk, an extra shot or "no onions", that are not stocked variants. Set them in the product editor under At the register:
- Add modifier group and name it (for example "Milk").
- Set At least — 0 makes the group optional, 1 or more makes it required — and At most, the number of choices that can be picked (1 for "pick one").
- Add choice for each option, with what it Adds to the price (blank is free).
The register adds each chosen modifier's price to the item, and the choices print after the item's name on the receipt, the order and the customer display. Modifiers are offered at the register only; the online store does not show them. The At the register section shows only on plans that include POS.
POS sales create normal orders tagged pos, decrement the same inventory
as your online store (per location if you use locations), and appear in
the orders list under the channel filter.
For the readers, scanners, printers and tablets that work with the register, see POS hardware.
Selling past the count
If a line is for more units than the count says are on the shelf, the register says so under that line — "Only 1 in stock — selling 2" — and still lets you take the sale. The shelf is the truth at a counter: if the item is in your hand it exists, whatever the number says. Your managers are notified of the shortfall so the count can be corrected afterwards with a stock adjustment.
Products set to allow backorders never show this, because selling past zero is what that setting asks for. Products with stock tracking switched off have no count to be short against.
Online checkout is different: there, a product set to deny out-of-stock purchases really does refuse.
Taking payment
A sale can take as many payments as it needs. The amount box above the payment buttons starts at the whole balance; to split the bill, type a smaller amount and pick a tender, and the rest stays open for the next one. Every payment is listed with its status (Waiting, Approved, Declined, Canceled). The sale is paid when the balance reaches zero, and only then is the stock taken and the order completed.
| Tender | What happens |
|---|---|
| Cash | Enter what the customer handed you, or tap Exact or a round-up amount. The register shows the change to give. Less than the amount due is taken toward the sale and the rest stays open. |
| Card reader | Sends the amount to a card reader; the customer taps, inserts or swipes there. Shown only when card readers are available for your store and one is registered. With more than one reader, pick which one under the buttons. |
| Type card | Staff type the card into Stripe's own card form (card not present, such as an order taken over the phone). The card never touches the register, and the payment goes through Stripe's normal online checks, 3-D Secure included. |
| Card (QR) | Shows a QR code; the customer scans it and pays on their phone, and the payment appears on the register as soon as it goes through. |
| Gift card | Type or scan the code. Check balance shows what the card can spend; Apply card takes the smaller of that balance and what is due, so a card worth less than the sale leaves the rest open. |
| Room | Charges a checked-in stay's folio. Shown only when a guest is checked in. |
Card payments that are still waiting can be canceled, which frees that amount for another tender. If the card reader declines a card, Retry sends the same charge back to the reader, so the customer can try again or use another card.
Void sale cancels the whole sale and hands back everything taken on it: card payments are refunded, gift cards re-credited and room charges removed. Cash is the one thing the register cannot return — hand it back to the customer yourself.
Platform fees at the register
Your plan's platform fee is charged on the sale, not on how it was paid — the rate is the same whether the customer hands you cash, taps a card or charges it to their room. What differs is only how it reaches us:
| Tender | How the fee is collected |
|---|---|
| Card reader, typed card, card (QR) | Deducted from your Stripe payout for that payment |
| Cash | No payout to deduct from — added to your next monthly invoice |
| Gift card | Same as cash: added to your next monthly invoice |
| Charge to room | Same as cash: added to your next monthly invoice |
A split sale does each part its own way: every payment carries the share of the fee for the part of the sale it paid, so the card parts are deducted from their payouts and the rest goes on the invoice. Tips carry no platform fee. Stripe's own processing cost on a card payment is passed through at cost, like any other card sale, and is worked out on the whole charge, tip included, because that is what Stripe charges on.
The customer never pays the fee, and the amount Due on the register is the same on every tender. On plans with a 0% fee there is no platform fee to collect either way. See Billing & plans for your plan's rates.
When something disconnects
- If a card payment does not go through, Cancel it and take the amount another way — a sale never takes stock until it is paid.
- If the card reader is offline, check it is on and connected to the internet, or take the payment by QR or a typed card.
- Cash sales need no network round-trip beyond saving the order; if the console loses connection entirely, note sales on paper and enter them when back online.
Tips
Tips are off until you turn them on. The settings are on your site's Admin → Plugins → Commerce page, in the Commerce settings card:
- Ask for tips at the register — off by default.
- Tip choices (%) — up to four percentages, separated by commas. Defaults to 15, 18, 20, 25.
With tips on, the payment panel shows a button for each percentage and No tip, so the cashier can choose one for the customer. With a customer display paired, Ask on display lets the customer pick a percentage, type an amount or choose no tip on their own screen. When no tip has been added yet, the card reader asks the customer itself, showing the first three of your percentages.
A tip is added on top of the payment it rides on and can be at most that payment's amount. Tips are yours: they are not counted as sales and carry no platform fee.
Receipts
When a sale is paid, the register shows the change due (for cash) and the receipt options. Receipts at the register, in the same Commerce settings card, decides what happens first:
| Setting | What happens when the sale is paid |
|---|---|
| Ask the customer (default) | With a customer display paired, the customer chooses email, text, print or no receipt on their screen. Without one, the cashier offers it. |
| Always print | The receipt prints straight away. |
| No receipt unless asked | Nothing is sent or printed unless the cashier does it. |
Whatever the setting, the cashier can always type an address into Email receipt to and tap Send, type a phone number into Text receipt to and tap Text, or tap Print receipt (or Gift receipt, which leaves the prices off). Text receipts are shown only when text messages are available for your store. Receipts print on the 80 mm layout described in Printed receipts, through the browser's print dialog, so any receipt printer with a system print driver works; see POS hardware. Tap New sale to start the next one.
Card readers
A card reader takes card payments at the counter: the customer taps, inserts or swipes, and the reader can ask for a tip. The register works with Stripe's smart readers, the Stripe Reader S700 (and S710) and the BBPOS WisePOS E. Card readers are shown only when they are available for your store; when they are not, the POS devices card has no card reader controls and the register has no Card reader button.
To add a reader:
- On the reader, open Settings and choose Generate pairing code.
- In the console, open Commerce → Settings → POS devices and choose Add card reader.
- Enter the registration code the reader shows, give the reader a name (such as "Front counter reader") and, optionally, pick the register it belongs to. A reader left on Any register can be used from every register.
- The first reader you add asks for the store's address — where the reader is used. Stripe sets the reader up for that country.
Each reader is listed with its register and an Online or Offline status, and can be renamed, moved to another register, or removed. A removed reader has to be registered again with a new code to be used. A reader must be switched on and connected to the internet to take a payment; the register warns you when the selected reader looks offline. See POS hardware for setup notes.
In test mode, add a reader with the code simulated-wpe to get Stripe's
simulated reader. While a payment waits on it, the register shows
Simulate tap to complete it with a test card.
Customer display
A customer display is a tablet facing your customer. It shows your store's logo (or name) and a welcome line between sales, the basket with its total as you ring it up, and it lets the customer choose a tip and a receipt themselves.
To pair one:
- On the register, tap Pair display next to the Register heading. It shows an address and a 6-digit code. The code works once and expires in 10 minutes.
- On the tablet, open that address — your console address followed by
/kiosk/commerce/pos-display— and enter the code. No one signs in on the tablet.
Once paired, the register's button reads Display connected. During a sale the display shows:
- The basket — each line, the subtotal, any discount, the total and what has been paid so far. Once a tip is added it is shown on its own line, with the Total with tip under it. Amounts are in your store's currency.
- Tip choices — when tips are on and the cashier taps Ask on display: a button per percentage, an amount the customer types, or no tip.
- "Tap, insert or swipe your card on the reader." while a card reader payment waits.
- Receipt choice — when Receipts at the register is Ask the customer: email, text (shown only when text messages are available for your store), print or no receipt. When the customer asks for an email receipt and Offer email sign-up on the customer display is on (it is by default), an unticked Email me news and offers box is shown under the address. Only a ticked box adds them to your marketing audience.
After the customer answers, the display thanks them and says the cashier will finish up. When the sale is paid and the receipt is handled, it shows Thank you! for a few seconds and then returns to the welcome screen. The email address or phone number the customer typed is not kept on the display: it is cleared as soon as the receipt is sent. Change the welcome line with Customer display welcome in the Commerce settings card (blank shows "Welcome").
Paired displays are listed under Commerce → Settings → POS devices with a Connected or Not connected status. Sign out there unpairs a display, and so does removing its register; it then has to be paired again with a new code.
Reservations
For stays (cabins, rooms, rentals):
- Add resources on the Products page — nightly rate, weekend multiplier, minimum nights, deposit percent, and free-cancellation window.
- Drop the Reservation widget on any page in the besigner and point it at the resource id. Guests pick dates, see a live quote, and pay the deposit (or full amount) at checkout.
- Manage stays from the Reservations card: check in, check out (with a folio summary if the guest charged store purchases to the room), walk-ins, no-shows, and cancellations.
Taking a reservation deposit is a sale, and it is checked against your plan at the moment a guest tries to pay — not just when you added the widget. On a plan without commerce the widget still renders but checkout answers "Reservations are not enabled". Enabling the plugin is your switch; including commerce is your plan's. See downgrading.