Build a workflow
A workflow is a sequence of steps that runs automatically when something happens on your site. This guide builds one end to end.
Pro+. Workflow runs are metered per tier.
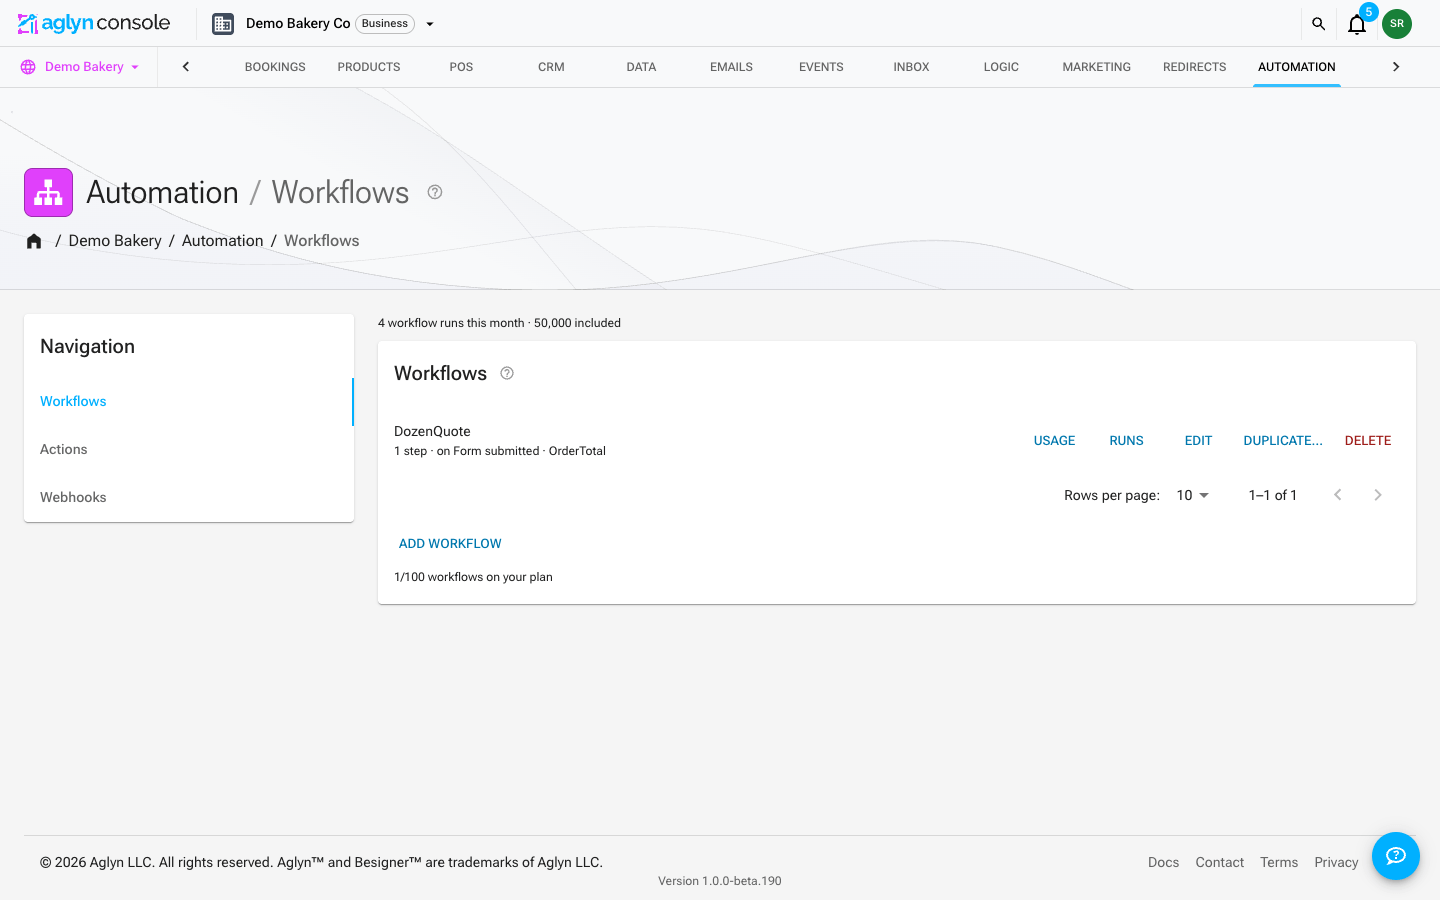
1. Open the workflows page
In the console, go to Automation → Workflows and choose New workflow. Give it a name that describes the outcome (e.g. "Welcome new member").
2. Choose a trigger
Pick the site event that starts the workflow — for example a form submission, a new
member, a booking, or a CRM event such as Contact
created. The event's data is available to every step that follows, and the Filter
field's helper text names the keys the chosen event puts in scope. A filter runs the
workflow when it is truthy — a field name such as subscribe, or arithmetic — and can't
compare values, so the editor refuses path == "/pricing" and its like. To start a
workflow only when a field matches, start it from an
action with a condition and a
Run a workflow step.
3. Add steps
Add steps in order. Each one's Do picker offers two kinds of step.
Call a function is what a workflow has always been, and what a new step starts as.
It runs one of your functions and binds the
answer under a Result name — step1 when you leave it blank — so every step after it
can use the value in an expression. You can compose an existing workflow inside a
function or variable, and vice versa; workflows are composable.
Everything else in the picker is a step from the actions builder — write to or update a dataset, send an email, notify site admins, enroll the contact in a list, assign a campaign, send a webhook, the CRM steps, and the flow steps below. They take the same fields, the same Only if condition, and the same plan tiers they take in the actions builder: server-side steps are Pro+, a webhook and custom JS are Business, and the CRM steps need the CRM.
The in-page effects — menus, drawers, class toggles, redirects, analytics events — are not offered. A workflow runs on a server event, and there is no page open to perform them on. If you need one, build it as an action instead.
Wait, and ending early
The three flow steps make a workflow a sequence rather than a single burst, and they behave exactly as they do in an action:
- Wait holds for anything from a minute to 90 days. Everything before it runs at once; the rest picks up later, with the results your function calls had already bound still in scope.
- Wait for something to happen continues as soon as the event you pick happens for
that person, or when the timeout you set runs out. Set an Only if condition of
_waitTimedOutis not empty on the next step to tell the clock from the event. - End the flow here stops the rest. With an Only if condition it is a branch.
A waiting workflow needs to know who it is waiting for, so the trigger's information has to include an email address; without one the wait step reports an error. Editing a workflow does not change it for people already waiting inside it — they finish the version they started. Deleting it stops them. See Sequences for the rest, including what a wait means for the emails sent after it.
4. Save and test
Save the workflow. When the trigger fires, the workflow runs and each run counts once toward your tier's metered allowance — however many steps it has, and whatever they are. Its steps take their own plan gates one at a time, and none of them is counted as an action run on top.
Test run evaluates the function calls and nothing else. A step that sends, writes or charges is not something to rehearse, so it is left to the run itself; what comes back is each call's result and the workflow's return value.
At the top of the Workflows tab, 12 workflow runs this month · 5,000 included
reports the metered allowance you're spending. The allowance is your workspace's, shared
by all of its sites, so the count includes every site's workflow runs. When the month's
runs reach the limit, triggered workflows stop running on every site — silently, without
queueing and without billing on — so it's a number worth glancing at before you wonder
why an automation went quiet.
Each workflow row has a Runs button. It opens the run-history table described under Run history — Time, Trigger, Result, What happened.
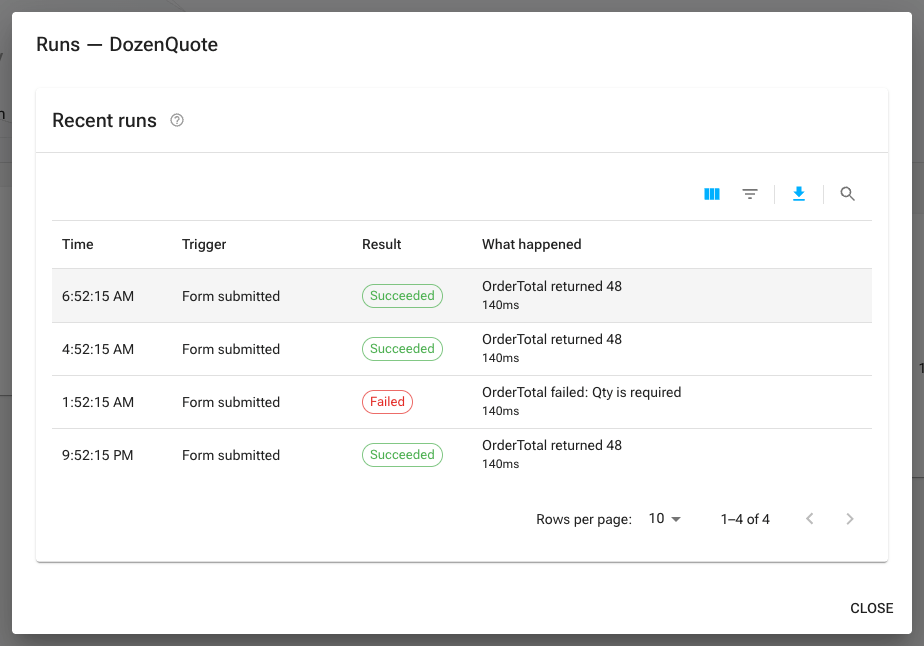
What happened reads what each step did, joined — saved to Leads · sent email · tagged website — or the error when a step failed. A workflow of function calls alone reads
Ran, with the time it took beneath.
Workflow executions were written in a shape the table did not recognize, so anything that ran before AGL-2222 is filtered out of it. Those runs are not lost — the dashboard's Recent Activity card and Admin → Activity show every one of them, as "Workflow ran on formSubmission" with the duration appended and failures in red.
Duplicate a workflow
Each workflow on the list has a Duplicate… button beside Edit. The copy keeps every step and the return value under the name you give it, and arrives disarmed: its trigger is cleared, so nothing runs twice until you open the copy and choose a trigger. It counts against your workflow allowance like a new workflow.
Tips
- Keep steps small and named — a workflow reads like a checklist.
- Watch your metered run count on the billing usage meters if a workflow runs on a high-frequency event.