Drag-and-drop hierarchy
Every element on the canvas is a node in a tree. You rearrange that tree by dragging — and you add new elements by dragging them in from the drawer. This page covers all the ins and outs: where you can drag, how drop zones decide placement, why some elements accept children and others don't, and what happens when a drop isn't allowed.
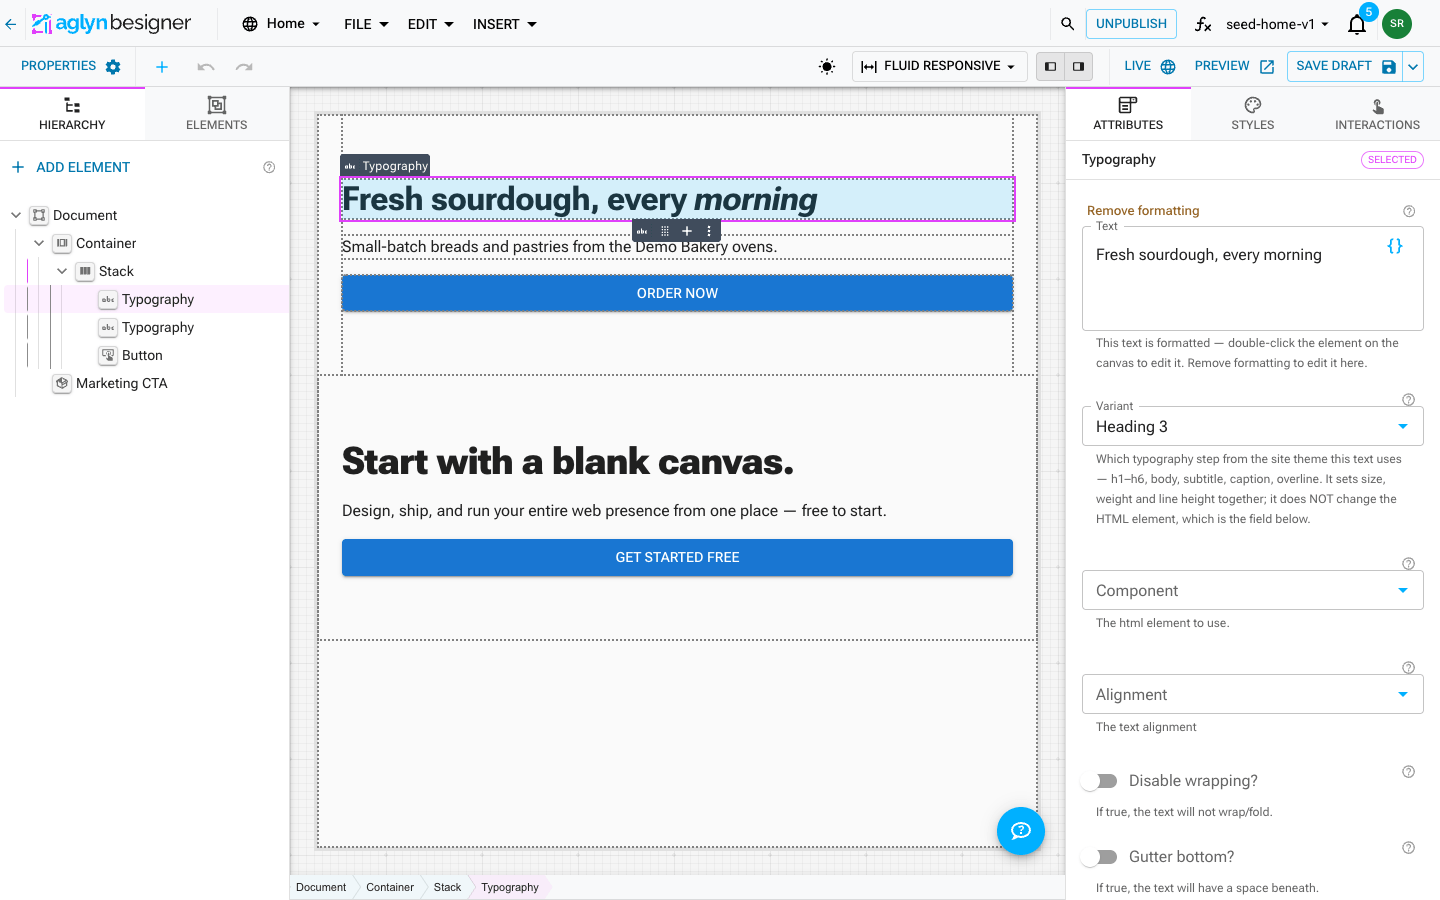
Where you can drag
Drag-and-drop works in two places, and they stay in sync:
- The hierarchy panel — drag a node up, down, or onto another node to reorder or reparent it. Good for precise moves and for deeply nested trees.
- The canvas — grab an element on the live page and drop it where you want. Good for visual, in-context placement.
A move made in one place is immediately reflected in the other.
What a drag does
- Reorder — drag a node between two siblings to change its position in the same parent.
- Reparent — drag a node onto a different container to move it into that container.
- Add — drag a component from the elements drawer onto the canvas to create a new element at the drop point.
Every drag is a single undoable step — press Undo (⌘/Ctrl+Z) to put it back.
Drop zones: edges vs. center
As you drag over an element, the Besigner splits it into drop zones and shows a placement marker for the zone you're pointing at. The zone decides where your element lands:
- Edges — the thin bands along an element's top, bottom, left, and right. Dropping on an edge places your element as a sibling, before (top/left) or after (right/bottom) the element you're over — in the same parent.
- Center — the large area in the middle. Dropping in the center places your element inside, as a child of that element.
The placement marker is the source of truth. A line between elements means "reorder/insert as a sibling here"; a marker within an element means "drop inside as a child." Always glance at the marker before you release.
Containers vs. leaf elements
Whether the center zone means "drop inside" depends on the kind of element you're over.
Containers accept children
Containers are built to hold other elements: Stack, Box, Section, Card, App Bar, Toolbar, and similar. Dropping onto a container's center nests your element inside it. This is how you build structure — a Stack of buttons, a Section full of blocks, and so on.
Leaf elements don't — dropping on one makes a sibling
Leaf elements have no slot for child elements. There are three kinds:
- Text elements render their content as inline text — a Page Link, a Button, or a Text element. Their words are their content; there's nowhere to nest a child.
- Self-closing elements draw themselves and take no children at all — an Image, an Icon, or a Video.
- Elements whose content is an attribute look like containers but draw only what their attributes say — a Markdown block (its document is the Content attribute), a List Item Text row (its words are Primary/Secondary), a Reusable Component instance (its content lives in the definition), and a Layout Slot (filled by the page bound to the layout). Anything nested inside one of these has nowhere to appear on the published page.
Dropping onto a leaf places your element as a sibling right after it, inside the leaf's parent — never nested inside the leaf. Over a leaf you'll only ever see a before/after placement marker, never an "inside" one, so the marker always matches where the element actually lands.
Aiming at the middle of a small element like a Page Link used to tuck the new element inside it, where it wouldn't render as expected. Now a leaf's center reads as "place next to me," which is almost always what you want — and you don't have to aim precisely at its edges.
The third kind is the one that used to bite hardest. A Markdown block accepted a drop and then drew only its Content attribute, so the element sat in the hierarchy looking placed and never appeared on the page — work that read as never done rather than broken. Those elements now behave like every other leaf, so what you see in the tree is what the site publishes.
Adding a new element
Insert → New Element (and the toolbar +) adds the component you pick relative to your current selection, following the same container-vs-leaf logic as a drop:
- Select a container — a stack, section, or the document itself — and the new element is added inside it.
- Select a leaf — anything without a child slot, such as a page link, button, or icon — and the new element lands as its next sibling in the same container, rather than nested inside it.
- With nothing selected, the element is added at the end of the document.
You can also drag straight from the elements drawer, which groups components into curated categories (Sections & Blocks first, then Layout, Navigation, Text, and so on). A dragged-in component lands using the same drop-zone and placement rules described above.
When a drop is rejected
Not every element can go everywhere. Two kinds of guardrails apply:
- Placement (lineal) rules. Components can declare what they accept as children or require as a parent — a Toolbar belongs in an App Bar, a layout slot accepts only certain content, and so on. If a drop breaks a rule, the Besigner rejects it and tells you why, naming the specific rule, so you can adjust instead of guessing. The same rules run for Insert → New Element, so you can't create an arrangement that drag-and-drop would refuse to make.
- You can't move an element inside itself (or into one of its own descendants). That move is blocked with a clear message.
Layout-only components are additionally gated by the view type you're editing (a page vs. a shared layout).
Moving an element without dragging
Dragging isn't the only way to move an element between containers. Every element's ⋮ menu — on the canvas overlay, and on the hierarchy row — carries four move actions that work by clicking:
- Shift up / Shift down — reorder the element among its siblings, without changing its container.
- Move out of container — lift the element out of the container it's in, landing it directly after that container, one level up.
- Move into element above — tuck the element into the sibling directly above it.
Used together, these reach anywhere in the tree: move out, shift until the element is sitting next to the container you want, then move into. This is the reliable route in a deeply nested tree, on a long page where the source and destination aren't on screen at the same time, or any time a drag is fiddly.
Each action is a single undoable step, and each obeys exactly the same rules a drag does — including the leaf rule. An element whose content is an attribute (a Markdown block, a Reusable Component instance, a Layout Slot, a List Item Text) can't hold other elements, so Move into element above is grayed out over one, and Move out of container refuses to drop an element into one. When an action is unavailable the Besigner says why rather than moving the element somewhere it would never render.
Multi-drag
Select several nodes first, then drag any one of them to move the whole selection at once. The group keeps its document order at the destination, and each node is still checked against the placement rules — anything that can't legally move is skipped rather than blocking the rest. See Multi-select & multi-drag.
Tips
- Watch the placement marker — it's the definitive preview of where the drop lands.
- Aim at an edge to place beside an element; aim at the center of a container to place inside it.
- Dropping on a leaf always makes a sibling — you don't have to be precise about its edges.
- Undo any drag you didn't mean.
- Use the hierarchy panel for precise moves in busy or deeply nested trees.